
Hi everyone, I am back again with another project with the amazing ladies from Thinking Outside The Box!
This month we were asked to design an hinged style box.

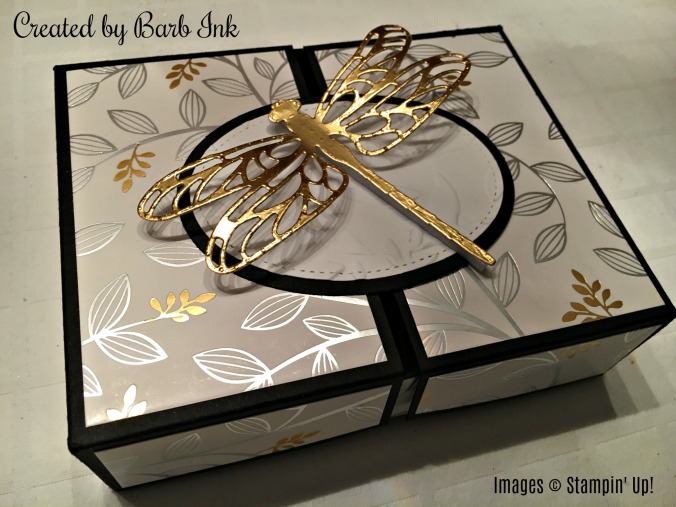
This is the box I made. I had to use the Springtime Foils Sale-A-Bration Designers Series Paper as it is so beautiful!

This style of box was actually introduced to me by my friend Susan who showed us how to make this gorgeous box, so I wanted to showcase what I came up with here! This wonderful little box will hold regular A2 style cards, or you could “ think outside the box” and fill it with your heart’s desire!
Now let’s get started!
Step One:
Cut a piece of cardstock at 8 ½ x 7 ¼ for the bottom of the box, and then score along all four sides at 1 ½ all the way around. Cut out notches at both ends of the sides that measure 7 ¼. See photo for placement of notches.


Cut out two pieces of cardstock at 7 ⅜ x 4 ¼ and then score along three sides, the two shorter and one longer side, and score at 1½, cut out notches and taper ends. See photo for placement of notches and tapered edges. Fold along all of the score lines.


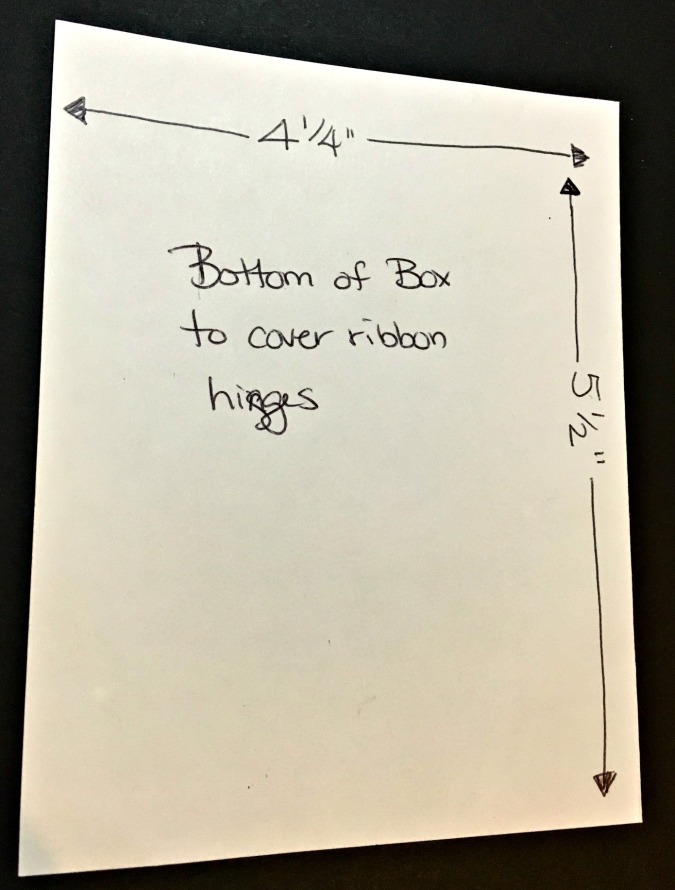
Cut one piece of cardstock at 5 ½ x 4 ¼ to cover the bottom of the box.
Step Two:
Cut your Designer Series paper:
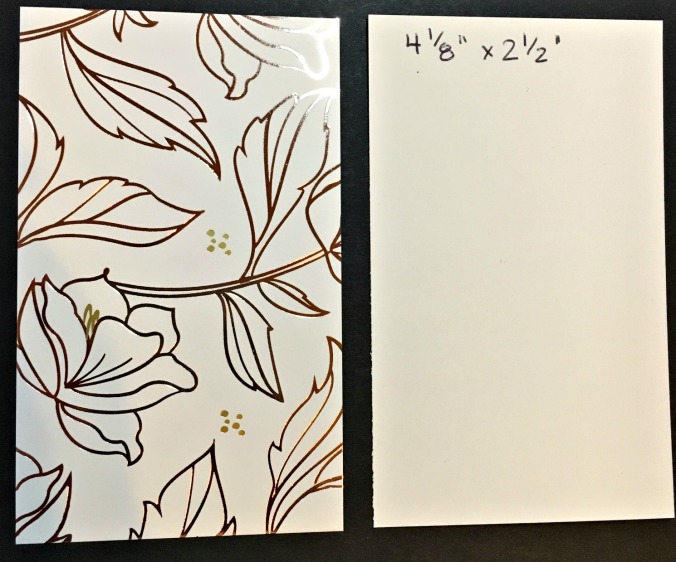
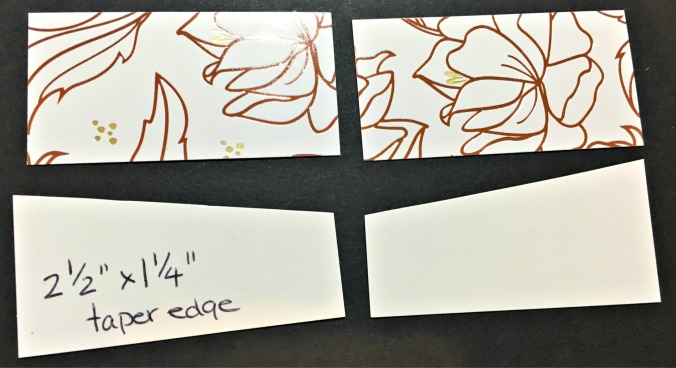
Cut DSP to decorate box. Cut two pieces at 4 ⅛ x 2 ½ for the top of the box.
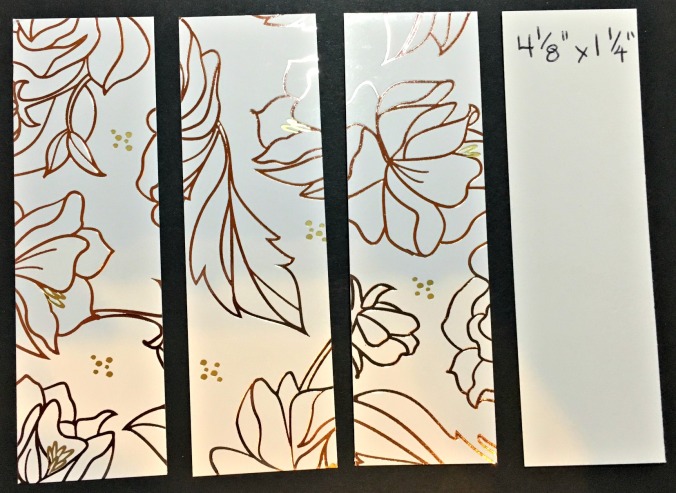
Cut four pieces at 4 ⅛ x 1 ¼ for the outer and inner shorter sides of the box.
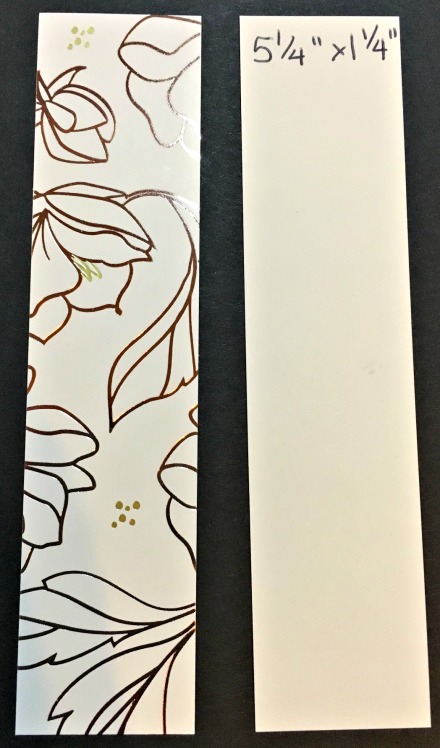
Cut two pieces at 5 2/8 x 1 ¼ for longer side of box.
Cut four pieces 2 ½ x 1 ¼ with diagonal piece cut off. See photo for tapered edge.
Cut piece of DSP at 5 ¼ x 4 for the inside of the box.

Before adhering your panels, lay out all of your pieces to see where they all fit. Attach panels to unassembled box and lid.


I used tombo glue to adhere all of my DSP pieces to the sides of the lid and box.
Step Three:
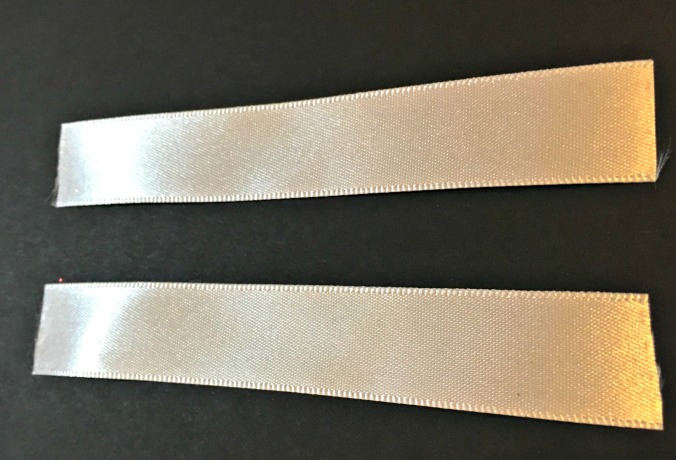
Cut two pieces of ribbon 4 ¼ choose ribbon that is at least ⅝ in width.
Step Four:
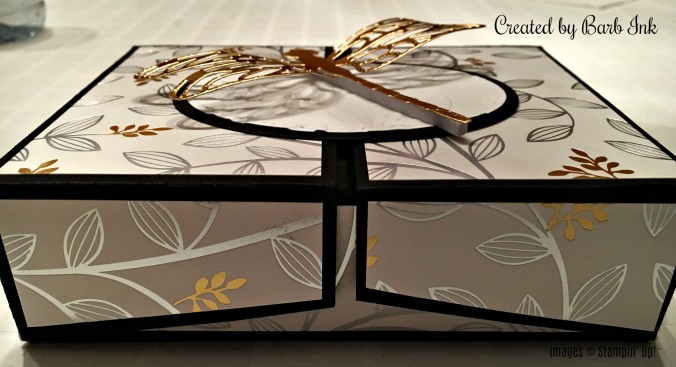
To assemble your box glue your two top lids together and assemble the bottom and then turn it upside down.


Adhere the two pieces of ribbon across the ends of the two shorter edges to create the hinge.
Make sure you adhere the ribbon to the box bottom and the two lids BEFORE you adhere your DSP pieces to make sure that the hinge is hidden.
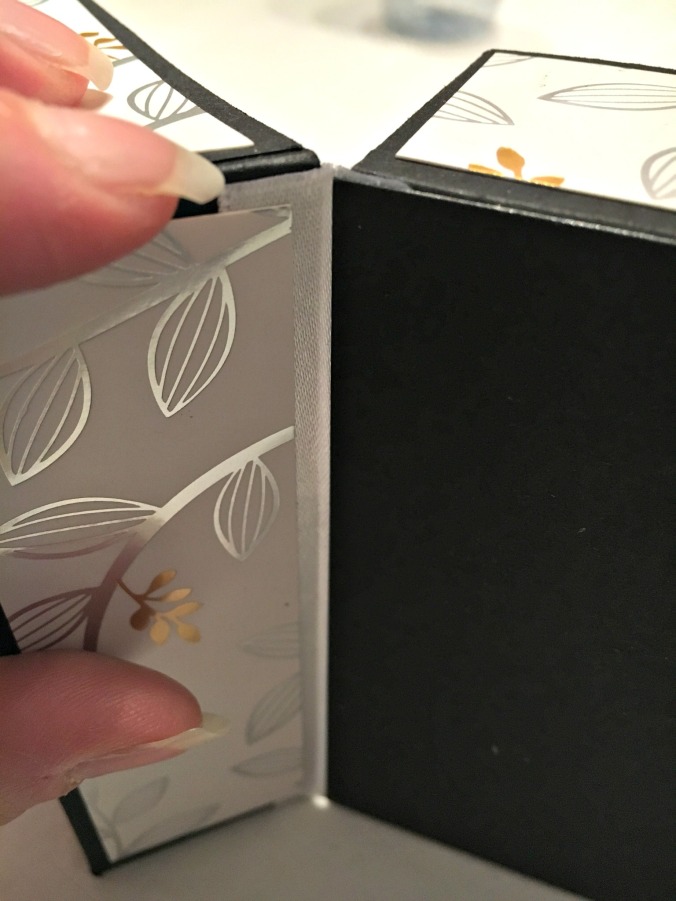
Once all your DSP has been glued on, glue down your 5 ½ x 4 ¼ piece of cardstock at the bottom of the box to cover the ribbon hinge.


Step Five:
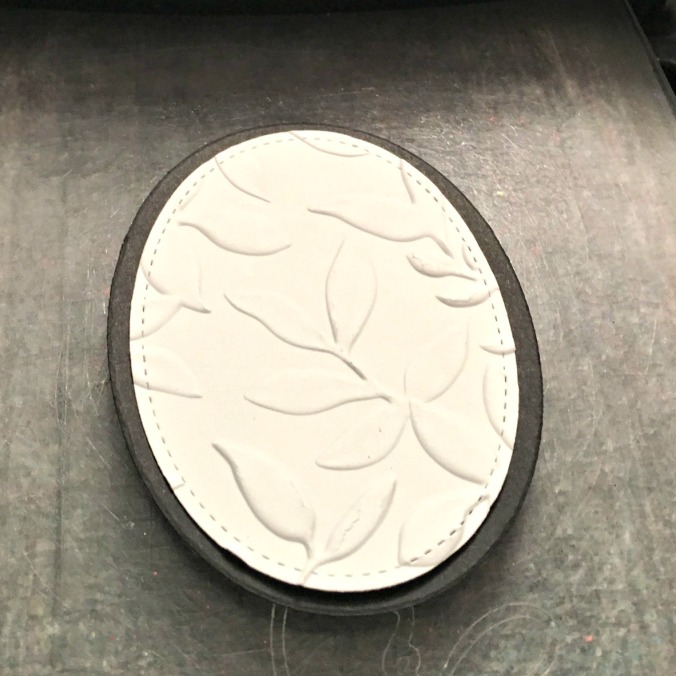
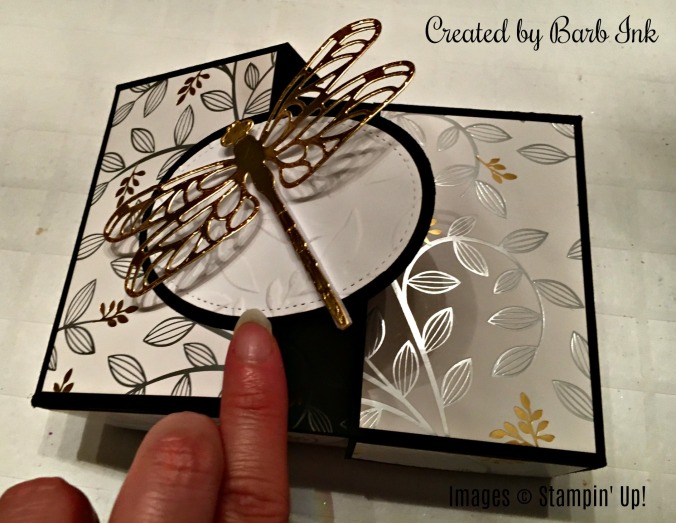
Cut out oval in Whisper White and Basic Black cardstock.

Emboss the white oval with the layered leaves embossing folder.


Adhere it to the black oval, and then adhere it to only one side of the box lids.
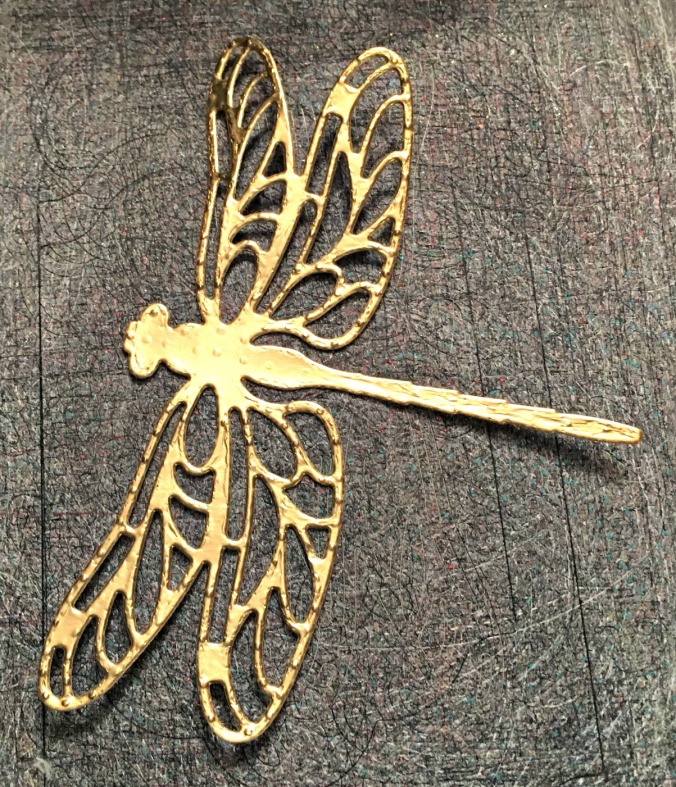
Cut out large dragonfly and adhere it to the oval.
And ta-da! You have yourself a cute box to store cards in!
Products used:
- Black cardstock – item number 121045
- Sale-a-Bration Springtime Foils Designers Series Paper – item number 147193
- Dragonfly Thinlits – item number 142749
- Stitched Shapes Framelits – item number 145372
- Layering Ovals Framelits – item number 141706
- Layered Leaves emboss folder- item number 143704
- Gold Foil- item number 132622
- Simply Score board – item number 122334
- Big Shot – item number 143263
- Tombo Glue – item number 110755
- Stampin’ Dimensionals – item number 104430
Remember, Sale-A-Bration is coming to an end soon, so if you want to take advantage and get your hands on this gorgeous and exclusive paper, please feel free to contact me.
I hope you enjoy my project, and check out the other incredible projects by this group of incredibly talented ladies! Thanks for dropping in!


- Shannean Moncrief – Australia
- Tanja Kolar – Germany
- Zoe Tant – United Kingdom
- Yoshiko Yamada Endo – Japan
- Annette Elias – Netherlands
- Sharlene Meyer – New Zealand
- Dena Plummer Rekow – United States
- Beate Wacker – Austria
- Aude Barbara – France
- Barb Stewart – Canada – You are here!


Pingback: Thinking Outside of the Box – Flip Top Box Tutorial | MagpieCreates
Fab box Barb and love the embossed topper. Zoe x
LikeLike
Thanks Zoe!
LikeLike
Absolutely fabulous box. So clever and beautiful. I have to notice (?) it.
Thanks for being part of our amazing and talented design team.
Hugs Tanja
PS: Can´t wait to see you again on the cruise
LikeLike
Stunning box Barb! I love the dramatic contrast between the DSP and the black card. And the ribbon hinges are ingenious!?! Such a beautiful project
LikeLike
Thanks Tanja, loving the hop this month, so many amazing projects that I can’t wait to try out myself! Can’t wait to see you too!
LikeLike
Oh another fabulous double hinge box! Love how you use the ribbon to hinge it – very clever! Thanks so much for sharing with us Barb!
LikeLike
WOW! This is a clever hinge with a ribbon!! I would definitely try this. Thanks for sharing!
LikeLike
Thanks Yoshiko!
LikeLike
I also think it´s a very clever hinge 😀 ! And the topper is so lovely! And the box … oh I love your awesome project!
LikeLike
Thank you so much for your incredibly kind words!
LikeLiked by 1 person