It is time for another Thinking Outside of the Box Blog Hop. I haven’t done one in awhile so I was super excited to jump back in and create something great! Our project this month is an Easel Top Match Box.

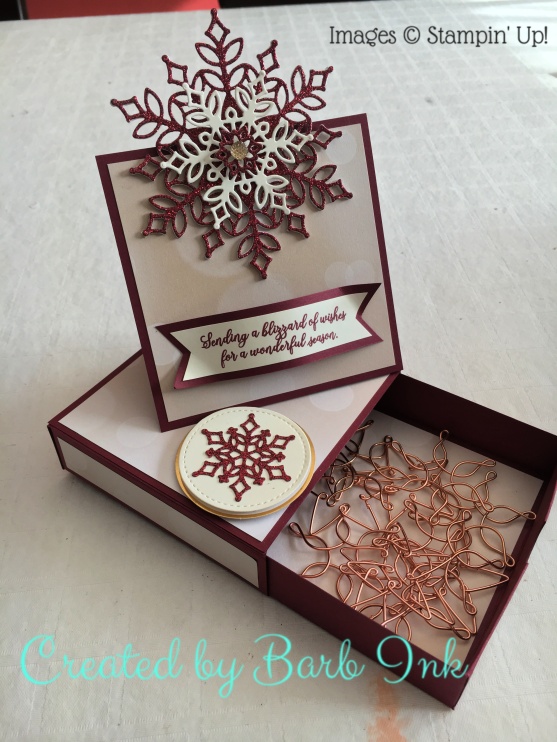
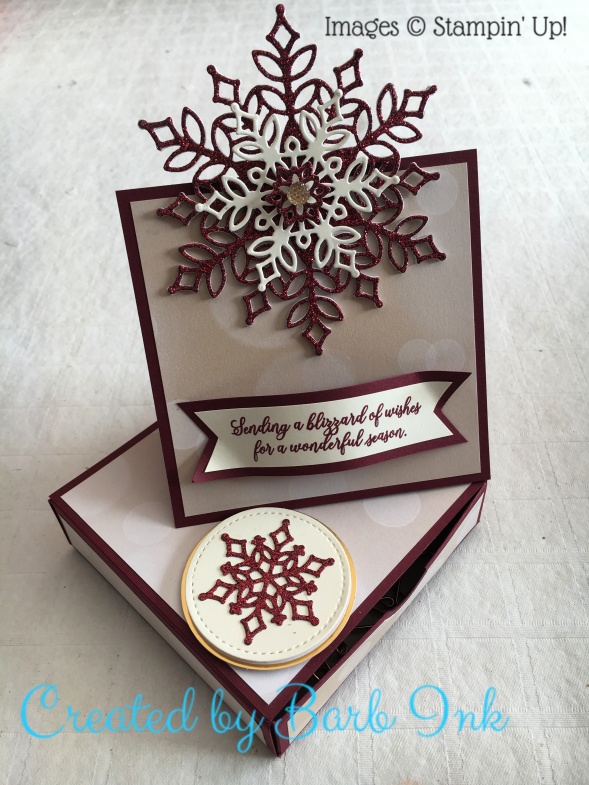
This is what I came up with. I used the Snowflake Showcase that will be available in November only! I was super lucky to get my hands on it first and have fallen in love with this exclusive suite!
Here we go!
Step One
Using the Stampin Trimmer, cut a piece of cardstock at 6 x 6 ⅞.
Then score on the 6” side at 1 “ and 5”. Turn your cardstock to the 6 ⅞” side and score at 1”, 5” and 6”.
Fold all of your scored lines.
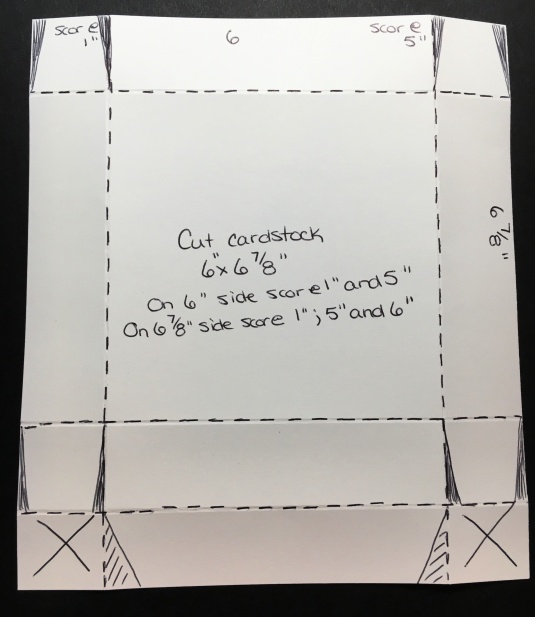
This will become your drawer insert. See photos for details on how to create the tabs.
I would recommend using the Stampin Trimmer for your cutting and scoring, as you will be needing to cut and score at 16th of an inch at some places, and the Trimmer has the notches to locate these dimensions.
Step Two
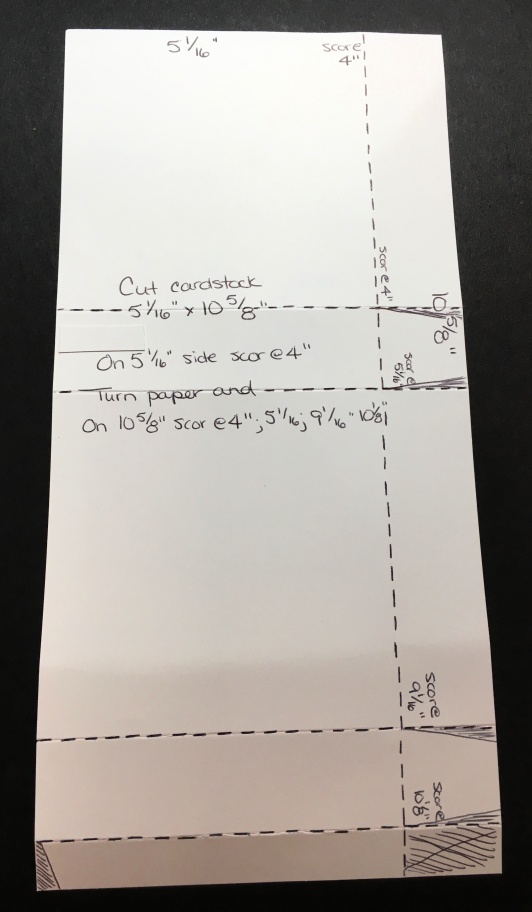
Cut a piece of cardstock at 10 ⅝” x 5 1/16”. Then score on the 5 1/16” side at 4”.
Turn your cardstock to the 10 ⅝” side and score at 4”, 5 1/16”, 9 1/16”, 10 ⅛”.
Fold all of your scored lines. This will become your box for the drawer.
See photos for details on how to create the tabs.
Step Three
Cut a piece of cardstock at 8” x 4” and score at 4” along the 8” side. This will become your card base.
On the bottom half of the cardbase, score diagonally across the paper. See photo for details.
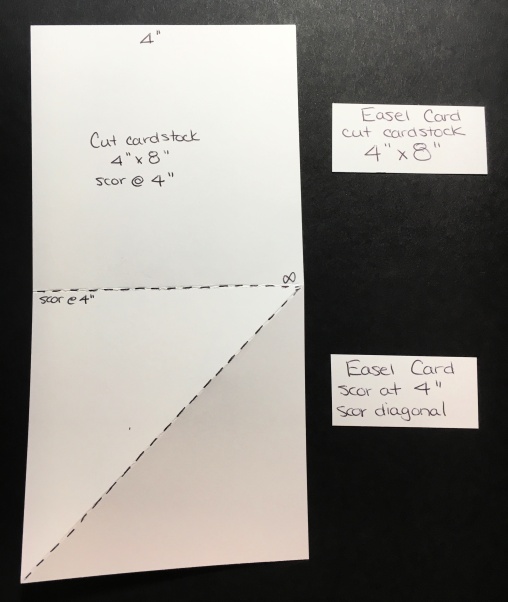
Fold on all of your scored lines.
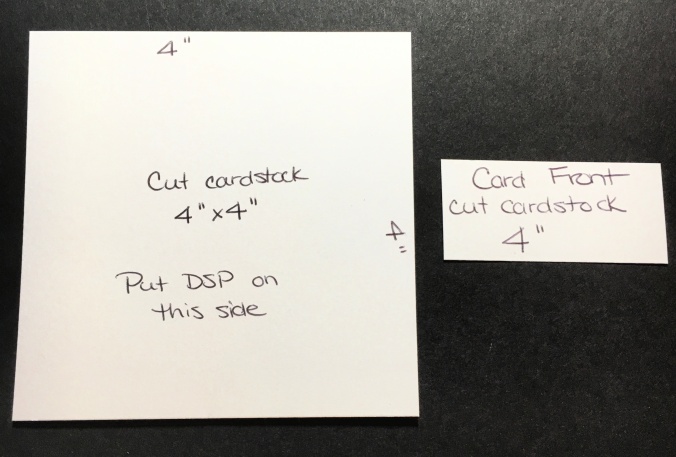
Also cut a piece of cardstock at 4” x 4” this will become your card front.
Once all of your pieces have been scored, cut and miter your tabs, and then using tombo glue, attach tabs to the sides and glue together.
Step Four
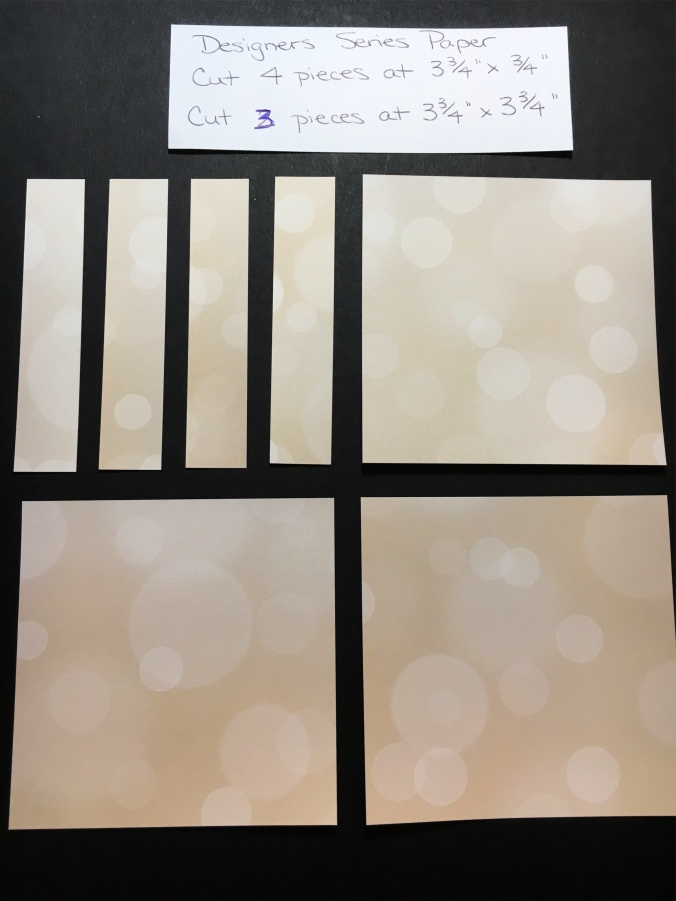
Designer Series Paper needed:
- Two pieces cut at 3 ¾” x 3 ¾”.
- One piece cut at 3 ¾” x 3 ¾” for the inside of the drawer
- Four pieces of DSP at 3 ¾” x ¾” for the sides of the box.
Step Five
To assemble the box and drawer, I used Tombo glue, but you can also use tear tape. You just want to make sure that you use a really strong adhesive to keep your box and drawer together.
Once you have assembled the drawer and box, using ¾” circle punch, create a tab on the front of the drawer to allow you to open and close with ease.
Adhere your four pieces of DSP to the box sides, but remember to also create the tab on the front piece of your DSP.
Step Six
Once your box and drawer are assembled, glue down your card front to the card base and attach your DSP.
Once your card has been put together, glue the bottom of the card base to the top of your box.
Decorate as desired.
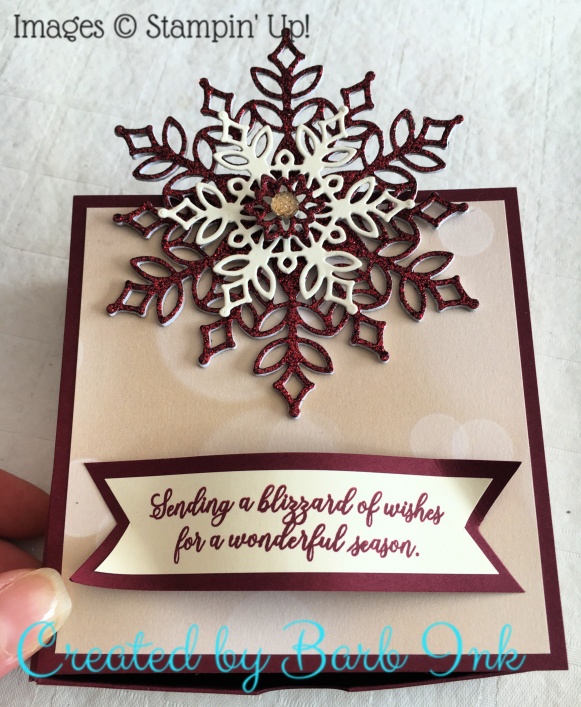
I used the largest snowflake from the Snowfall thinlits which is part of the exclusive snowflake showcase which will be available in November!


I cut this from the Merry Merlot glimmer paper.
I also cut an additional 3 snowflakes and glued them altogether to create a thick embellishment.


I also cut a medium snowflake from Very Vanilla and a small snowflake from the Merry Merlot glimmer paper.

I then used a small gem from the gold faceted gems for the centre of the snowflake.
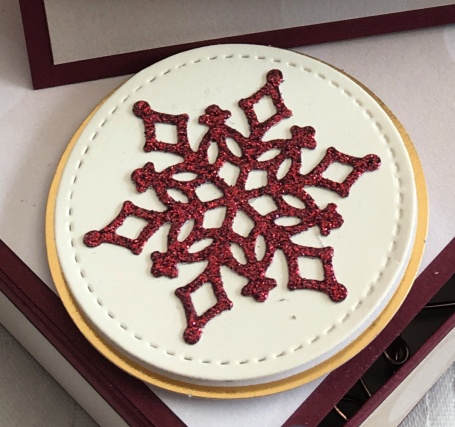
For the decoration to hold the easel card I punch out a circle from gold foil, and cut out a circle from the stitched thinlits and using dimensionals I attached them together.
I also used a snowflake from the Snowfall thinlits and then I attached this to the top of the box. I used dimensionals to pop both the circle layers so that when you prop up the card, it will keep it in place.
I hope you like my completed project. What a cute little gift to give to a coworker!
Here is a video that walks you through the steps to complete this project:
Products used:
- Big Shot
- Stampin Trimmer
- Merry Merlot cardstock
- Whisper white cardstock for sentiment and circle punches
- ¾” circle punch
- All Is Bright Designers Series Paper
- Joyous Noel 6 x 6 glimmer paper
- Snow Is Glistening stamp set
- Snowfall thinlits
- Stitched thinlits
- Gold faceted gems
- Gold Foil for circle punch
- Merry Merlot ink pad
- Tombo glue
- Stampin dimensionals
Now it is time to check out what this group of amazing demonstrators created! Have fun exploring their blogs and projects!


- Shannean Moncrief – Australia
- Yoshiko Yamada Endo – Japan
- Carrie Bates – UK
- Annette Elias – Netherlands
- Dena Plummer Rekow – United States
- Beate Wacker – Austria
- Aude Barbara – France
- Barb Stewart – Canada – You are here!


Pingback: Thinking outside of the box - easel top matchbox -
O I love the snowflakes and your twisted easel! Thanks so much for sharing! Iwill try!
Beate
LikeLike
This is just gorgeous, Barb!! I can’t wait to try your beautiful take on this box!!
LikeLike
Barb this project is simply gorgeous! I love it and the different angle of the easel card is just awesome!
LikeLike
Such a beautiful and stylish project! I really love it! So many great ideas are used!
LikeLike
Pingback: Thinking Outside the Box Blog Hop – Triangle Boxes | Barb Ink